

How to create a white label iOS app (Part 2)
 Michael Mavris
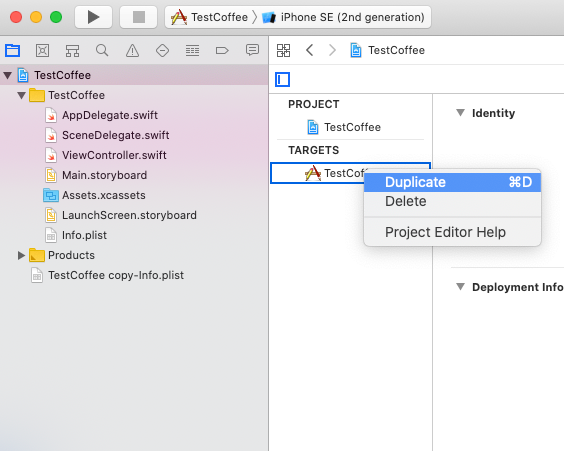
On Part 1 we talked about Targets and how to use them in a white label product, but we noticed a rising problem. We couldn't differentiate (easily) the .plist files for each target. So, we need to create a structure to keep the non-shared files for each target.
You can download the project here.
First, we will create a folder called Resources and then two subfolders called RealCoffee and TestCoffee (physical folders using New Group option), and then we will place each .plist under its corresponding target.
Note: There is an extra .plist file called TestCoffee copy-Info.plist. Please delete it.
Our project directory should look like this:
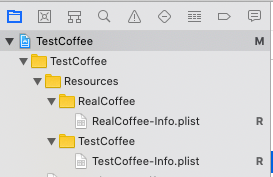
If you try to build and run the project you will notice that the Xcode is complaining about the Info.plist file. Since we renamed our Info.plist files, Xcode doesn't know where to find them so we need to set the path to the files. We will do that in Build Settings->Info.plist file. Just make sure to use the absolute value of the path. For RealCoffee is RealCoffee-Info.plist and for TestCoffee is $(SRCROOT)/TestCoffee/Resources/TestCoffee/TestCoffee-Info.plist. The reason is that the 2 files are located in different paths. We left it that way to demonstrate the difference.
Our structure is fairly easy to understand. Any file that is bound only to one of the targets, it should fall under the target's folder. To illustrate, click on RealCoffee folder and create an object called Coffee and set the target only to RealCoffee. Then, repeat the procedure for TestCoffee and set the target only to TestCoffee.
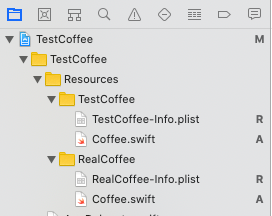
We will create 2 Coffee classes with different implementation in order to demonstrate how the targets interact with the files.
class Coffee {
    static func coffeeDescription() -> String {
        return "TestCoffee"
    }
}class Coffee {
static func coffeeDescription() -> String {
return "RealCoffee"
}
}Now let us update the coffeeIBAction to call the Coffee static function:
    @IBAction func coffeeIBAction(_ sender: Any) {
        let appName = Bundle.main.infoDictionary?["CFBundleName"] as? String
        let appVersion = Bundle.main.infoDictionary?["CFBundleShortVersionString"] as? String
        self.popUpOptionDialog("",content: "You have ordered coffee using the \(appName!) app with version \(appVersion!) and coffee description: \(Coffee.coffeeDescription())")
}Now, if you run the app you will notice that the result for coffeeDescription() is different for each target.
We have used this example because it's easy to understand the fundamentals, but it's not recommended to create the same class with different target membership. There is a better way and we will demonstrate it in the next part!
Happy coding!